I recently moved all of my websites over to Amazon Web Services, since they offer $100 of credits free for all students (and because shared hosting is pretty awful, particularly BlueHost/JustHost...). I didn't want to limit myself, so I decided to invest in Elastic Beanstalk -- a highly scalable solution for deploying web applications. There are a lot of benefits, including how easy it is to install an SSL certificate.
But there were some difficulties in my transition. For example, I had initially set up my domains so they forwarded the apex domain through Namecheap's URL Redirection to the www subdomain, and I set the www CNAME record to my Elastic Beanstalk address. But this didn't work for HTTPS; Namecheap obviously couldn't redirect https://neelsomani.com to https://www.neelsomani.com unless they had my SSL certificate, and they didn't offer such a service anyway. Then I tried just associating an Elastic IP address directly to the EC2 instance, but I knew that this wasn't going to work from the beginning; the entire premise behind Elastic Beanstalk is that you're not necessarily bound to one particular instance. So the Elastic IP address was unreliable.
Aside from domain mapping, I wasn't sure how to handle email forwarding. I wasn't going to pay hundreds of dollars for a Google Apps account when I had no use for the majority of Google Apps' features.
So I had three questions:
1) How do I seamlessly use a custom domain with Elastic Beanstalk?
2) How can I continue forwarding emails to my personal account?
3) And how do I accomplish the above for a reasonable price (less than $20)?
I put together this tutorial to help anyone out who's in a similar situation.
Route 53: Setting up nameservers
Let me start by saying that Route 53 Hosted Zones cost $6 a year per domain. So I don't use this for all of my domains -- only the ones that require HTTPS. For the rest of my domains, I'm happy to use the Namecheap/GoDaddy/registrar redirection server and a CNAME record.
Anyway, I followed this tutorial on the AWS website.
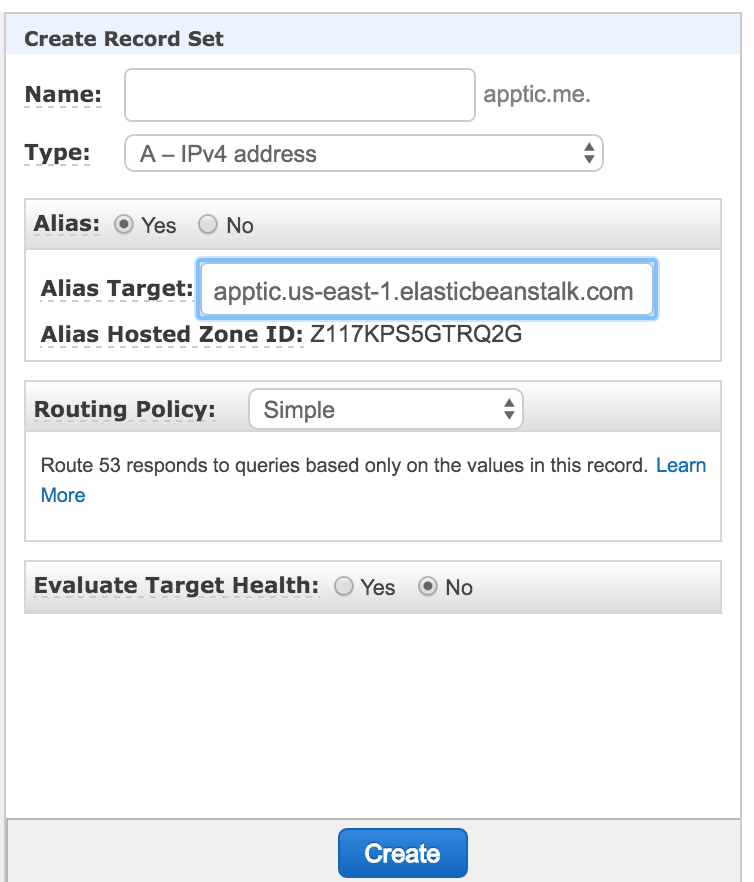
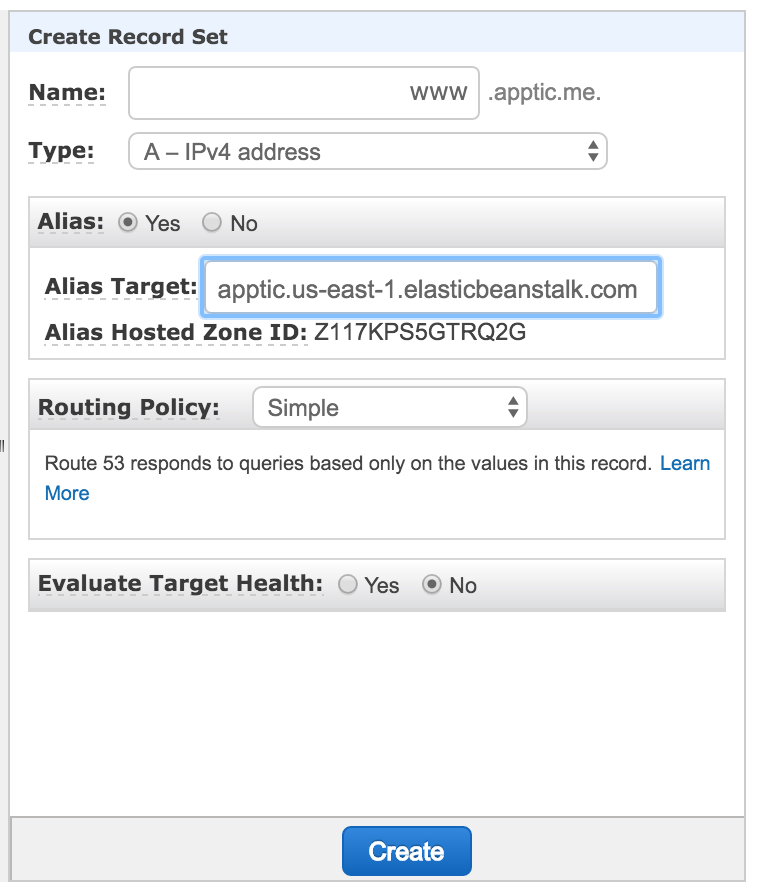
The only tricky part was that you need to set two A records: one for non-www, and another for www.


Setting up email forwarding
To handle emails, I ended up just paying the $10 a year for Namecheap's Private Email service. It's kind of a rip-off, especially since even GoDaddy offers this functionality for free. But for Namecheap, it's only free if you use their nameservers. Amazon WorkMail is much more expensive. I would have used Amazon SES with an Amazon Lambda function, but unfortunately I'd have to change the "From" header before forwarding each email (meaning that emails wouldn't come from the original sender).
Anyway, once you set up your Private Email inbox, you need to set your MX records through Route 53 as described in the Namecheap mail server documentation.
And finally, set up email forwarding.
Conclusion
So if you're a student like me, you're not paying much for a great package. For highly scalable website with an SSL certificate, private GitHub repos, and all the benefits of AWS, you end up paying about $132 for a year ($216 for the load balancer + a free year of a t2.micro instance + $6 for Route 53 + $10 for email + a free domain - $100 of free student credit). That's totally worth it; if you even design just one website a year for cheap, you're still making profit.
